Build tabs and a detail screen with Expo Router
This tutorial builds a small Expo Router app with two tabs, Home and Settings. The Home tab lists five items. Pressing an item opens its own screen, at a URL such as /item/3, and that screen reads the item's id from the URL. A test file checks each step with Expo Router's testing library.
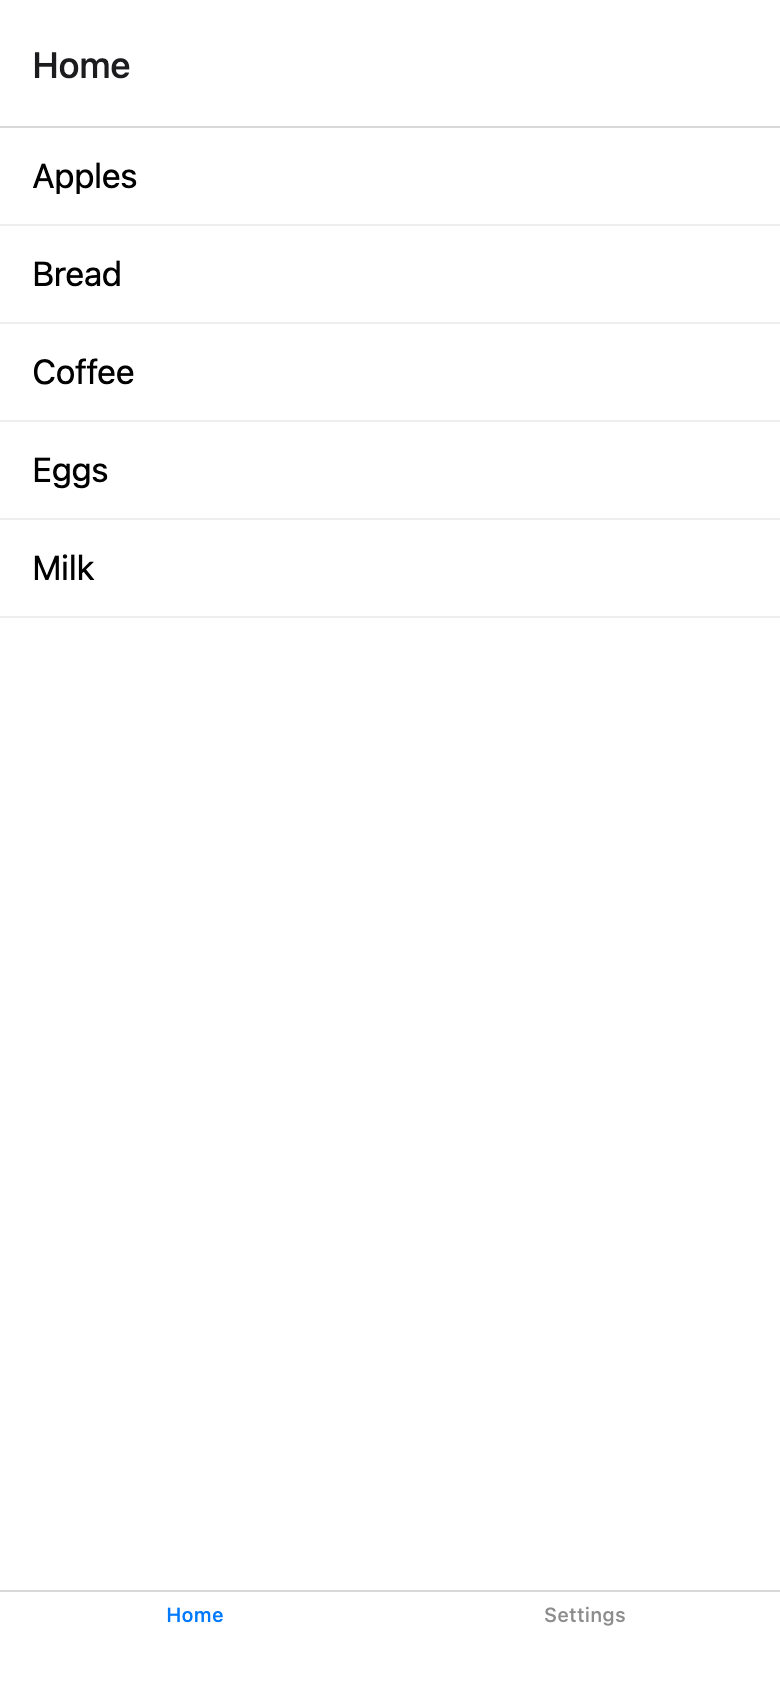
The example is an Expo project. Its routes are the files in app/: two layouts and three screens. Its other own files are src/items.ts and __tests__/navigation.test.tsx. The project has no App.tsx: package.json sets main to expo-router/entry, and app.json sets a scheme and adds the expo-router plugin.
It uses Expo Router 58.0.32, from the expo-router package. For what changed in Expo Router with Expo SDK 58, see Expo SDK 58 ships with React Native 0.88 and iOS 27 support.
The data
export type Item = { id: string; title: string };

// The items listed on the Home tab. Each id is the last segment of the
// item's URL, from /item/1 to /item/5.
export const items: Item[] = [
  { id: '1', title: 'Apples' },
  { id: '2', title: 'Bread' },
  { id: '3', title: 'Coffee' },
  { id: '4', title: 'Eggs' },
  { id: '5', title: 'Milk' },
];
Each item has an id and a title. The id becomes the last segment of the item's URL: Coffee, with the id '3', is at /item/3.
The root layout
import { Stack } from 'expo-router';

export default function RootLayout() {
  return (
    <Stack>
      <Stack.Screen name="(tabs)" options={{ headerShown: false }} />
      <Stack.Screen name="item/[id]" options={{ title: 'Item' }} />
    </Stack>
  );
}
A _layout.tsx file sets how the routes in its folder are shown. The root one puts them in a Stack, with two screens:
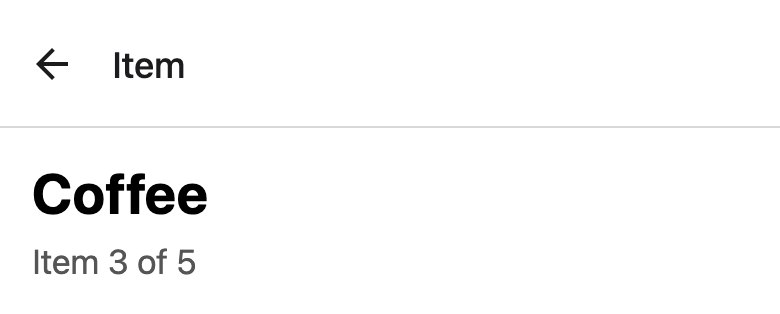
(tabs)is the folder of the two tabs.headerShown: falsehides the Stack's header there, so the tabs show only their own. The parentheses make the folder a group: its name is not part of the URL, so the Home tab is at/and the Settings tab at/settings.item/[id]is the detail screen. As a screen of the Stack, it gets the Stack's header, with the title "Item" and a back button, as in the second screenshot below.
The tabs
import { Tabs } from 'expo-router';

export default function TabsLayout() {
  return (
    // The tabs have no icons, so the tab bar hides the icon's place and shows
    // only the titles.
    <Tabs screenOptions={{ tabBarIconStyle: { display: 'none' } }}>
      <Tabs.Screen name="index" options={{ title: 'Home' }} />
      <Tabs.Screen name="settings" options={{ title: 'Settings' }} />
    </Tabs>
  );
}
Tabs turns the routes in app/(tabs)/ into tabs. Each Tabs.Screen names a route by its file name, index or settings, and gives it a title, which the header and the tab bar show. The tabs have no icons, so tabBarIconStyle: { display: 'none' } hides the icon's place in the tab bar.
The Home tab
import { Link } from 'expo-router';
import { StyleSheet, View } from 'react-native';

import { items } from '../../src/items';

export default function HomeScreen() {
  return (
    <View style={styles.container}>
      {items.map((item) => (
        <Link
          key={item.id}
          href={{ pathname: '/item/[id]', params: { id: item.id } }}
          style={styles.row}
        >
          {item.title}
        </Link>
      ))}
    </View>
  );
}

const styles = StyleSheet.create({
  container: { flex: 1, backgroundColor: '#fff' },
  row: {
    paddingHorizontal: 16,
    paddingVertical: 14,
    borderBottomWidth: 1,
    borderBottomColor: '#eee',
    fontSize: 17,
  },
});
index.tsx is the route at /, so the app opens on the Home tab. Each item is a Link. Its href is an object: pathname is the route, /item/[id], and params gives the value of [id]. The link for Coffee goes to /item/3.
The detail screen
import { useLocalSearchParams } from 'expo-router';
import { StyleSheet, Text, View } from 'react-native';

import { items } from '../../src/items';

export default function ItemScreen() {
  // The [id] segment of the URL: "3" for /item/3.
  const { id } = useLocalSearchParams<{ id: string }>();
  const index = items.findIndex((item) => item.id === id);

  if (index === -1) {
    return (
      <View style={styles.container}>
        <Text style={styles.text}>No item has the id {id}.</Text>
      </View>
    );
  }

  return (
    <View style={styles.container}>
      <Text style={styles.title} accessibilityRole="header">
        {items[index].title}
      </Text>
      <Text style={styles.text}>
        Item {index + 1} of {items.length}
      </Text>
    </View>
  );
}

const styles = StyleSheet.create({
  container: { flex: 1, padding: 16, backgroundColor: '#fff' },
  title: { fontSize: 28, fontWeight: '700', marginBottom: 8 },
  text: { fontSize: 17, color: '#555' },
});
The brackets in [id].tsx make the route dynamic: it matches /item/ followed by one segment, such as /item/3 or /item/9. useLocalSearchParams returns that segment as id, so the screen gets '3' for /item/3. It looks the id up in items, then shows the item's title as a header and its position in the list. An id that no item has, such as 9, gets a message instead.
The Settings tab
import { StyleSheet, Text, View } from 'react-native';

export default function SettingsScreen() {
  return (
    <View style={styles.container}>
      <Text style={styles.text}>No settings yet.</Text>
    </View>
  );
}

const styles = StyleSheet.create({
  container: { flex: 1, padding: 16, backgroundColor: '#fff' },
  text: { fontSize: 17, color: '#555' },
});
settings.tsx is the second tab, at /settings. It shows one line of text.
The test
import { userEvent } from '@testing-library/react-native';
import { renderRouter, screen } from 'expo-router/testing-library';

import { items } from '../src/items';

// Each test renders the example's own app/ directory, relative to the
// folder Jest runs in, so the routes are the real ones.

test('the Home tab lists the 5 items', async () => {
  await renderRouter('./app');

  expect(screen).toHavePathname('/');
  for (const item of items) {
    expect(screen.getByRole('link', { name: item.title })).toBeOnTheScreen();
  }
});

test('pressing an item opens its detail screen', async () => {
  const user = userEvent.setup();
  await renderRouter('./app');

  await user.press(screen.getByRole('link', { name: 'Coffee' }));

  expect(screen).toHavePathname('/item/3');
  expect(screen.getByRole('header', { name: 'Coffee' })).toBeOnTheScreen();
  expect(screen.getByText('Item 3 of 5')).toBeOnTheScreen();
});

test('an unknown id shows a message instead of an item', async () => {
  // initialUrl opens the app at this URL instead of at /.
  await renderRouter('./app', { initialUrl: '/item/9' });

  expect(screen).toHavePathname('/item/9');
  expect(screen.getByText('No item has the id 9.')).toBeOnTheScreen();
});

test('the Settings tab renders', async () => {
  const user = userEvent.setup();
  await renderRouter('./app');

  await user.press(screen.getByText('Settings'));

  expect(screen).toHavePathname('/settings');
  expect(screen.getByText('No settings yet.')).toBeOnTheScreen();
});
The tests run in Jest, with the jest-expo preset, the only Jest setting in the example's package.json. They use renderRouter, screen and the toHavePathname matcher from expo-router/testing-library, and userEvent from React Native Testing Library to press items and tabs.
renderRouter('./app') renders the example's own app/ folder, so the tests use the real layouts and screens. toHavePathname checks the pathname of the screen that is shown. The initialUrl option opens the app at a URL other than /. A Link has the role link, which the tests use to find each item.
The four tests cover these behaviors:
- the app opens on the Home tab, at
/, which lists the five items; - pressing Coffee opens
/item/3, with the title "Coffee" and "Item 3 of 5"; /item/9shows "No item has the id 9.";- pressing "Settings" in the tab bar opens
/settingsand its text.
Both screenshots show the web export in a 390 by 844 window. The second one was taken after clicking Coffee on the Home tab, and is cropped below the text.
Verified with Expo SDK 58 (React Native 0.88.1): type-checked, tested with Jest and React Native Testing Library, and exported for web.
Full example: reactnative/examples/router-tabs